Okay now, to begin you want to obtain a needle tool to cut with, and clay, thats it! Even less to start with than my last blog.
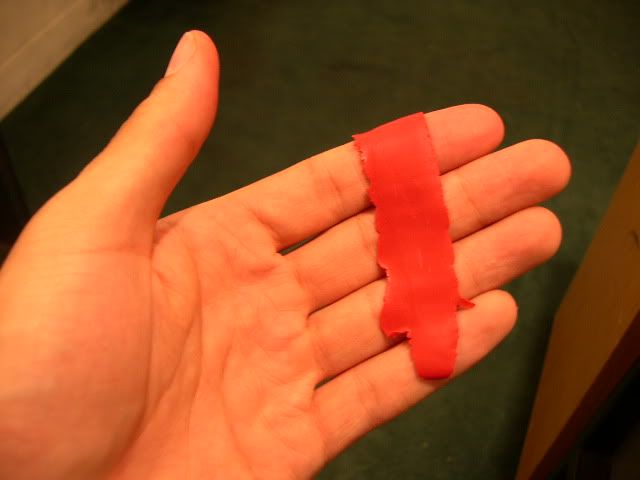
So to begin get some colored clay, pink, red, yellow are common, but you can always dazzle it up by mixing colors or using an off the wall color like gold and purple. Im going to use red. You dont need much clay, maybe a piece about the size of two rolling dice. Flatten the clay out, dont have a pasta machine? No problem, use a polymer clay rolling pin or other clean plastic or glass round object (like a drinking glass) to get the clay flat and thin, not paper thin, but close.
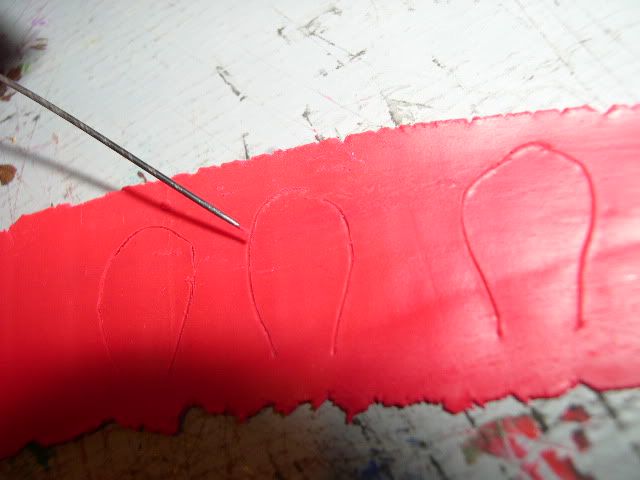
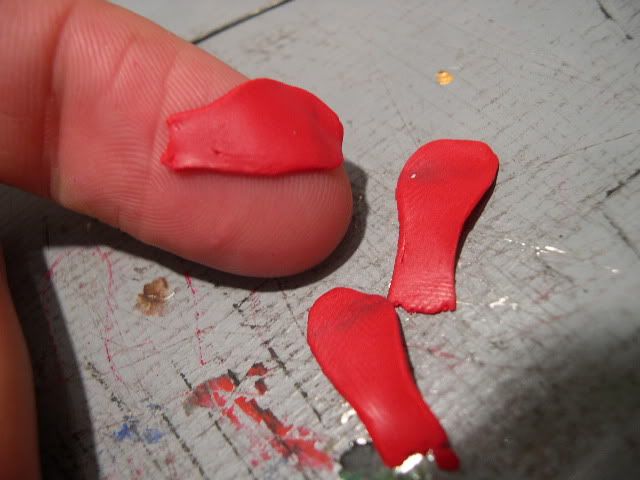
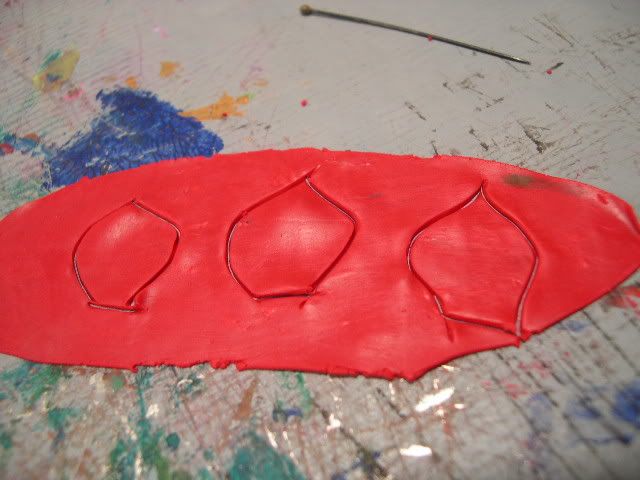
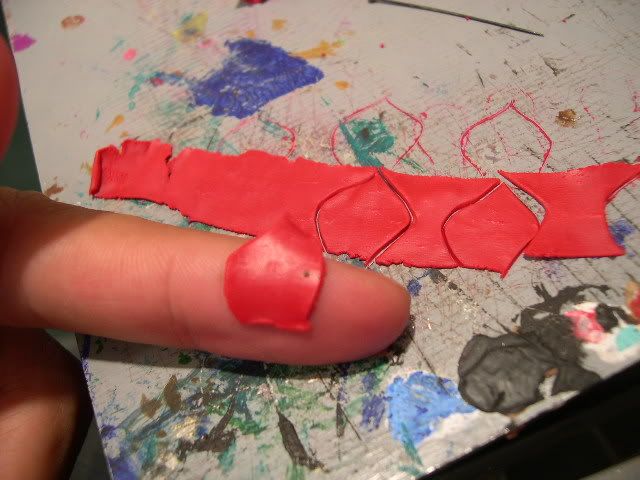
To make the rose we are going to divide the rose petals into three types, the first three inner ones, the secondary petals, and the tertiary or last finishing ones, I make these different shapes so keep note. The first three are lobe shaped, make three more or less the same size by cutting with the needle tool into the clay.
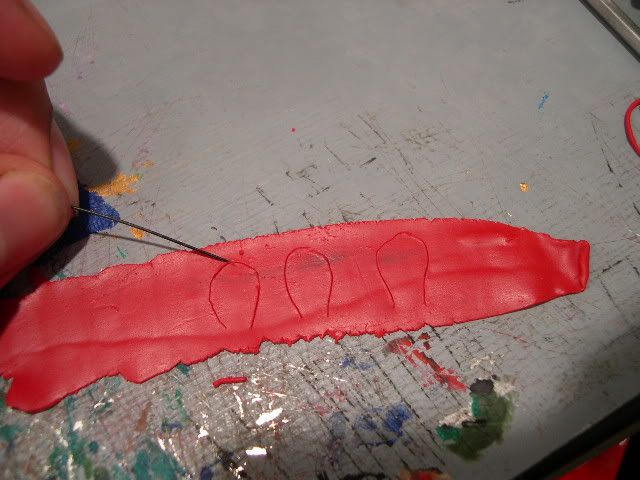
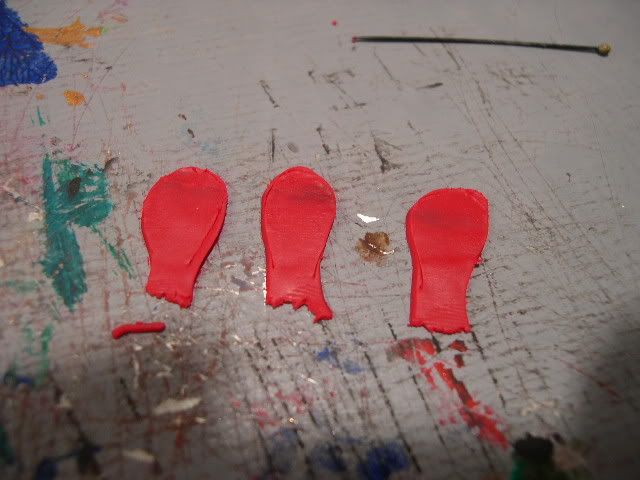
Remove the excess clay and smooth/round all the edges with your fingers (this is the most tedious part and you can actually skip it if you want rough edged petals).
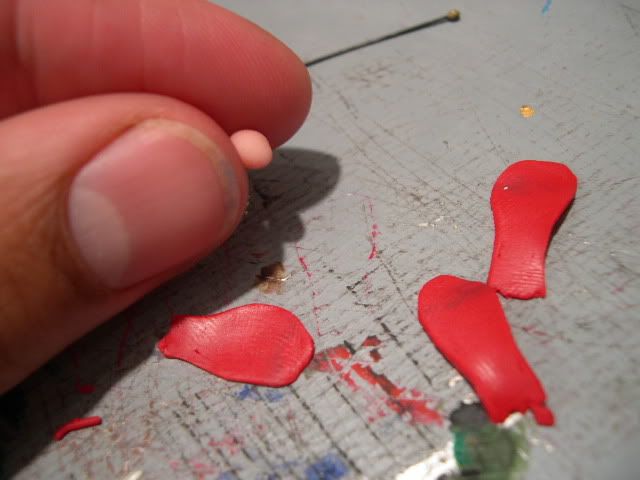
Next, make a small ball of clay (it can be red like the rest, no problem), this is going to be the center of the rose and is necessary if you want to just make a bud and not complete the entire thing
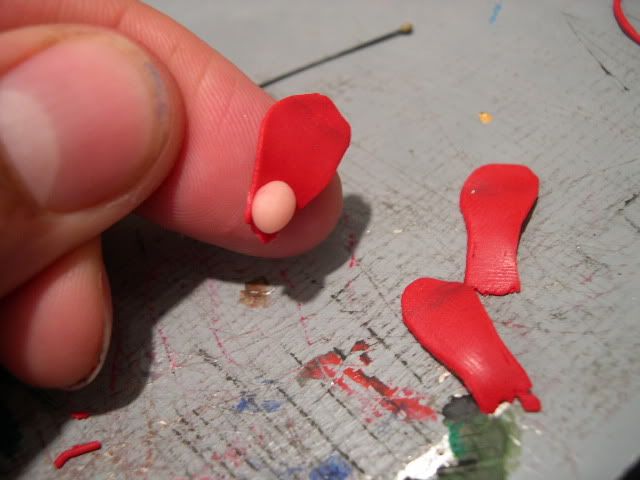
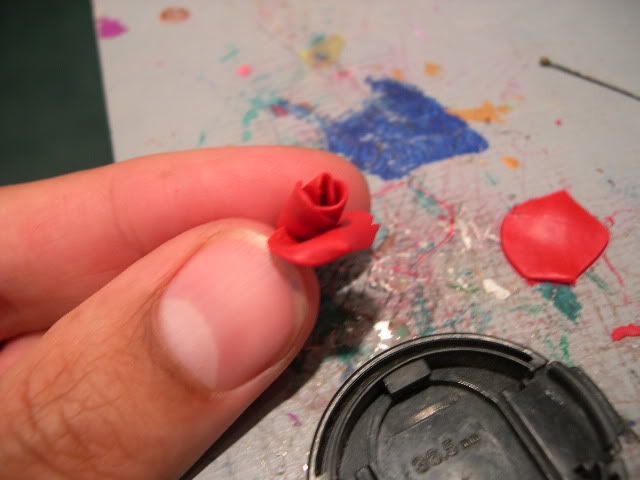
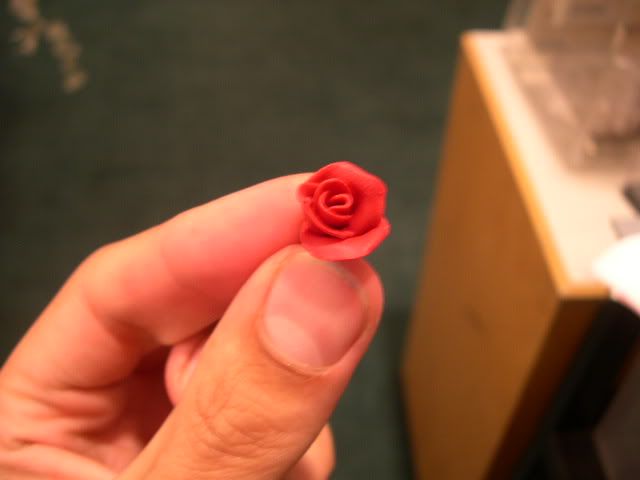
Now wrap the first petal around itself at the top as pictured, cover this petal with the second one wrapped around the opening of the first one, but with the third, dont put it directly atop the second one covering its opening, insetead offset it, hard for me to explain what I mean, so just follow the picture.

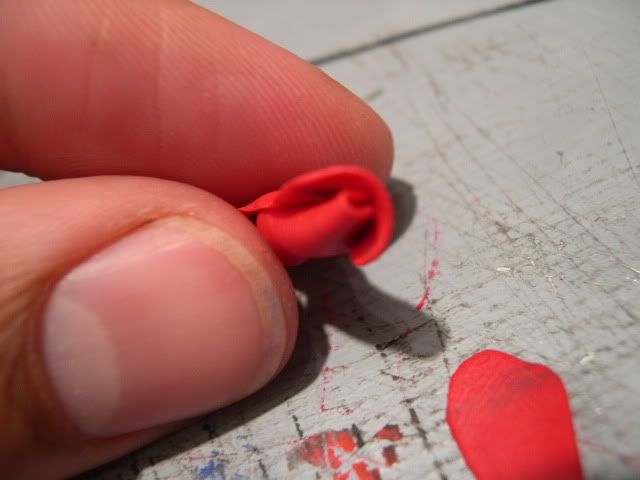
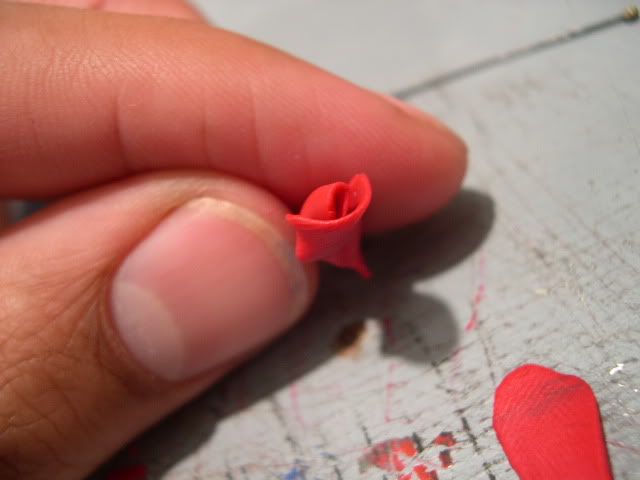
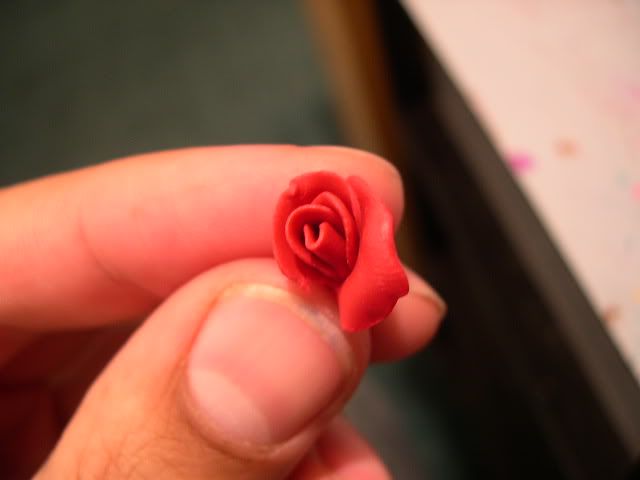
Now we have made some progress and have this cute little young rose, I often stop at this stage and use them as is.
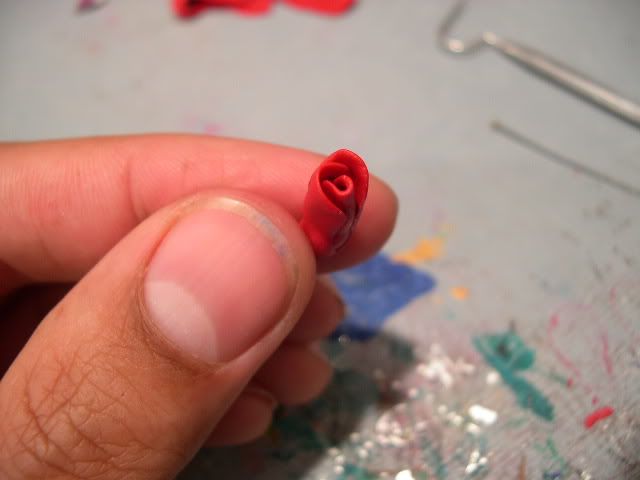
Next step is to move on the the secondary petals, there are only three of them, as you can see in the picture, I shape them differently than the first three, they are pointy at the top, and have more surface area. Cut three out.
The most important part of making nice roses is about to be revealed, so pay attention.
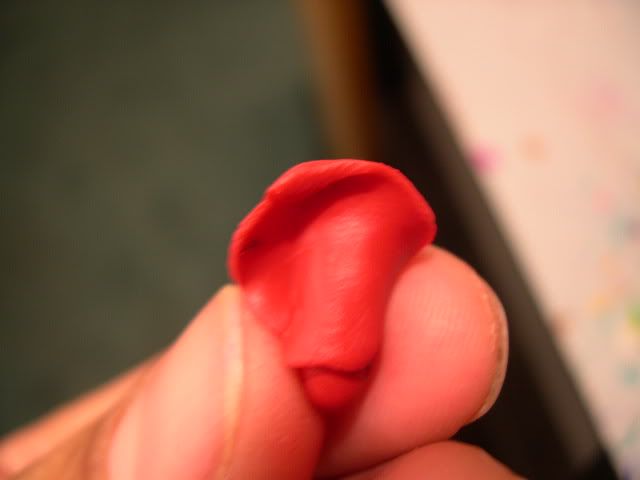
Rose petals are not strong, they curl at the edges when they are fully extended, so be sure to curl the rose petal over itself outwardly.
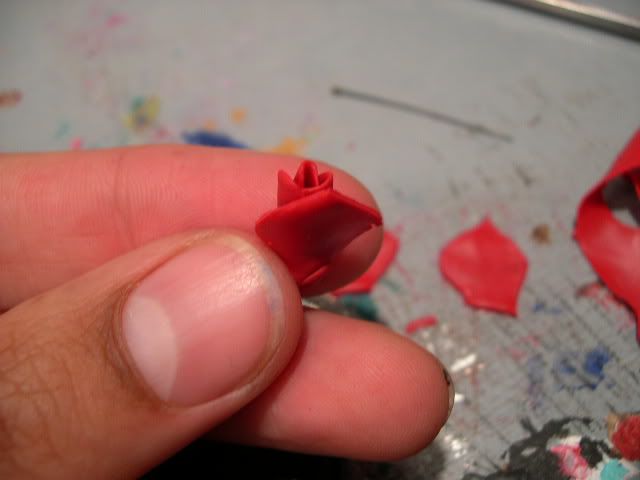
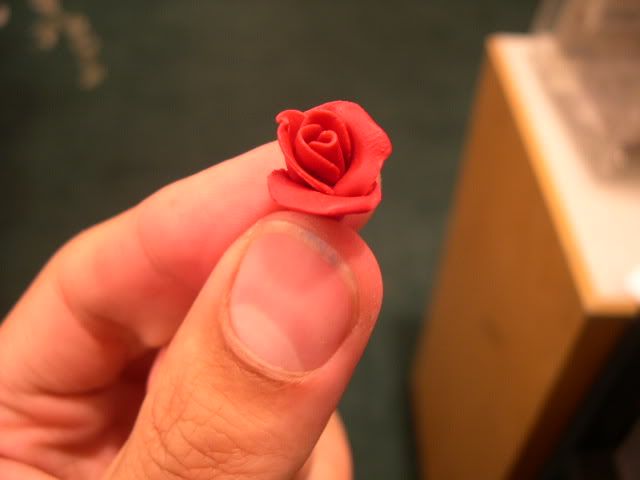
I like to attach the first of the two secondary petals adjacent to each other and then the third inbetween the first two.
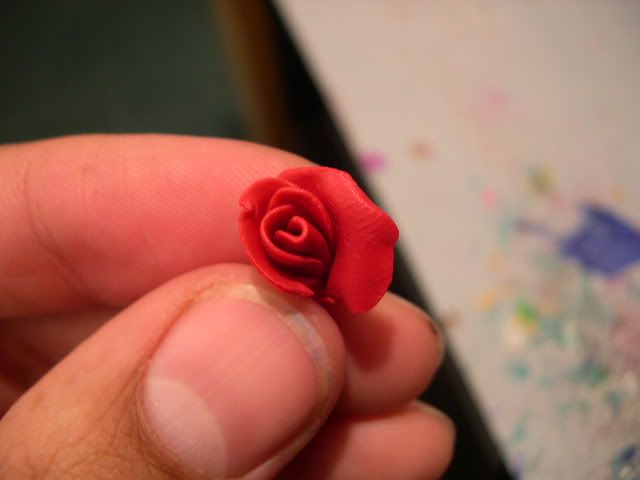
Now we have something really pretty, again, you can stop at this stage if you wish, or continue to have a rose in full bloom.
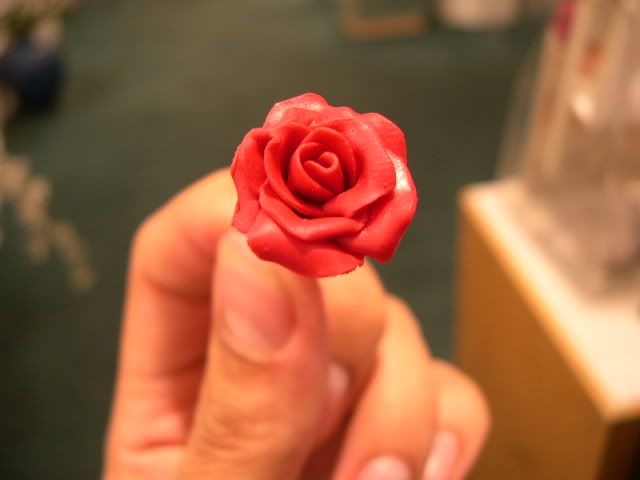
The next and last steps are to make the last four petals, make them really big, about twice the width of the first three, and a little bigger than the last three, again, make four of them.
Really crinkle up the edges now, remember, these petals are about to fall off the rose and die, ruffle them up. Simply add these to what you already have created and Voila! youve just made a teeny tiny masterpiece, bake it in your oven and make an entire bouquet!

Notes:
If you so feel you can make stems from wire covered with paper clay... what is paper clay? Its clay that is run through the pasta machine with toliet paper to make a strong material you can cut and wrap around wires to make green stems. You add these to the base of the rose, if you are really fancy add thorns and leaves.

8 comments:
Love these! I am a beginner at polymer clay so I will come back to this when I have a chance to play. I could make a beautiful necklace out of those lol! Great step by step photo's!
Great! Love the way you explained and the pictures showing us each step was really Good! Marked your blog in My Favorite places. I be back!
Lu :)
You did a great job on the tutorial. It must have taken a long time with all of those photographs!
Qqdwqdsaas ascaassc fdrewe:
"I come on a fine gentleman thrashing of a little lad, whereupon I
Breton. "If we are to have such a fight as will remain in the
thanks for the wonderfully detailed descriptions! Making my sis a rose necklace for Christmas!
ur a gay poohead
That is probably the best polymer clay rose I have ever seen! I ❤ Them! They are SOOO cute!
Omg this is so epic!
Post a Comment