Friday, April 30, 2010

loves me, loves me not

Whether they love you or love you not, be sure to always love thyself completely so that only you are responsible for giving the approval you need and you do not base your self worth on other peoples emotions.

Monday, April 26, 2010

plant daphne

If nature is really our mother lets treat her like it, not trash or try to destroy her or her offspring.

Thursday, April 22, 2010

endless possiblitities miniature sculpture

There is a new affirmation figure on the block.   She says in Spanish, anything is possible, and endless possibilities.  She also says love in English, and true love in Japanese. 
Images of the koi, butterfly, lotus, and birds are painted on along with my usual framing lines of movement.  The images symbolize freedom, spiritual ascension, and a rebirth from the murky depths of the past.  She is currently without wings and about four inches tall. 

Sunday, April 18, 2010

Some Awesome Pictures of Gratitude

THEYRE BACK!!!

The little ones are back!  I have begun making the tiny BP's again, co-gins, sprites, sparks, and the like are all back in business.  I know people will enjoy them because they are well made now and all have a story to tell.  The first girl above will stand as the symbol for Mexico.  The blonde out of the three in the middle is telling you to shoot for the stars... of which one she holds.  The curly headed chick is "Prosperity", and the little brown girl with the green stone is Health, Wealth, and the law of mutual exchange.  Prosperity is having perfect health FIRST, then wealth, and when you have these things, its important to follow the law of mutual exchange and to give out what you expect to get back in.  Sew and reap. 
The other figures are a mermaid, and Pati's new springtime girl.

Friday, April 16, 2010

Transformation, we all have past lives

She has a more recent one than most of us.
This figure I created to be a woman of LARGE stature, but decided instead to make Embrazada, the pregnant woman!  I took the same face and altered the eyebrows and re-shaped her body.  I am happy to have maternal energy around me. 

Thursday, April 15, 2010

Celebration of LIFE


A celebration of life, an appreciation of life.  Life is amazing, life is wondrous and always unfolding in new and exciting ways.  I do not fear my inspiration, when inspiration comes to me, pure and unadulterated, I do not alter it for public consumption, instead, I follow the voice of myself and paint whatever pattern comes to me.  For I know that when I serve the indwelling artist, I connect with my soul and always meet success and a  masterpiece.  This is why this geometric pattern was coupled with line, It does not make sense in terms of my usual design, but this pattern is what came to me and what transpired, I thought about henna but followed the inner voice, and this work of art was born.

Wednesday, April 14, 2010

Christianity

I am not the limitations of my early religious upbringing. 
Our thoughts and beliefs of ourselves and of life and of GOD/RELIGION must support us, not negate us, this is necessary for our lives to work. 

a little note

Sorry I have not been updating, the new shop has been taking most of my waking life, (it is a huge success!) and also making the sculptures.
I hope to soon make time to do a bi-weekly blog on the two days that I am not at TJ's, I have taken lots of pictures of new pieces I have made but have not yet found the time to blog about them. I will be posting soon.

Tuesday, April 13, 2010

Gratitude

Thanks and appreciation.  Appreciation and thanks.
Being thankful for what we have and are going to have.
I am thankful for having my little retail space be a big success and to be able to do what I love to do and to feel good about it, for this I made a commemoration piece.  Harlequin-esque pattern on her identifies her as the sidelined artist, but far from forgotten, her bright colors attract the attention of those she needs to assist her along the path.

Sunday, April 11, 2010

The space all set up

The spot!
Its all butterflied out, but I do have my sculptures in the top shelf front display, and in the counter top displays.


Today the girl below found a new home, she will be missed, but perhaps I will make a new henna girl soon.

Friday, April 9, 2010

ahem... we are go!

So today I took my daily trip to Unique to see how things were going along and, I see lights! The florescent lighting inside of the three display cases was on and the outlets were working!
I may still be one day delayed in opening though since I moved all the heavy big items today and ALL of my studio supplies (paint, brushes, clay, pasta machine, sharp needle tools, etc) and realize thta my entire studio is there, it is almost as if I am moving my studio into that place, so weird. But anyway, I may be pushed back one day because tomorrow I will finish moving in, all the displays are there but I need to take the art and butterfly stock now, so tomorrow I could be open, but probably will not be truly open for business. Sunday, April 11th will definitely be my first full day of fun though, I will let you know how it goes and what work(s) of art I create.

Thursday, April 8, 2010

We are...


It seems there is a problem getting the electricity on, so I am pushing my opening date from April 10th, to Saturday, April 17th, one week back. Stay tuned!

UPDATE: read the next blog!

Wednesday, April 7, 2010

Latin American girls

Okay yesterday I made three countries, and today I finished three more, ending my Latin American stint.  I have flags from the other countries as well, but will make them on request.
Today I finished Dominican Republic, Colombia, and Mexico.  Here is a picture of them and also with yesterdays Ecuador, Peru, and El Salvador. All made with a commercial polymer clay face mold.
Its really nice to have my little Co-Gins back, they were such a big part of the early days when I street vended in Union Square park (NYC) and lived in the Bronx.

Droplet

This work was created using the pattern I have put on another work of art, the pattern came to me when I was near the waterfalls and every time I employ it I am happy with the results.  Its ironic I call it droplets when it often reminds me more of feathers or scales on a fish.

Tuesday, April 6, 2010

how to make a face using polymer clay (photos)

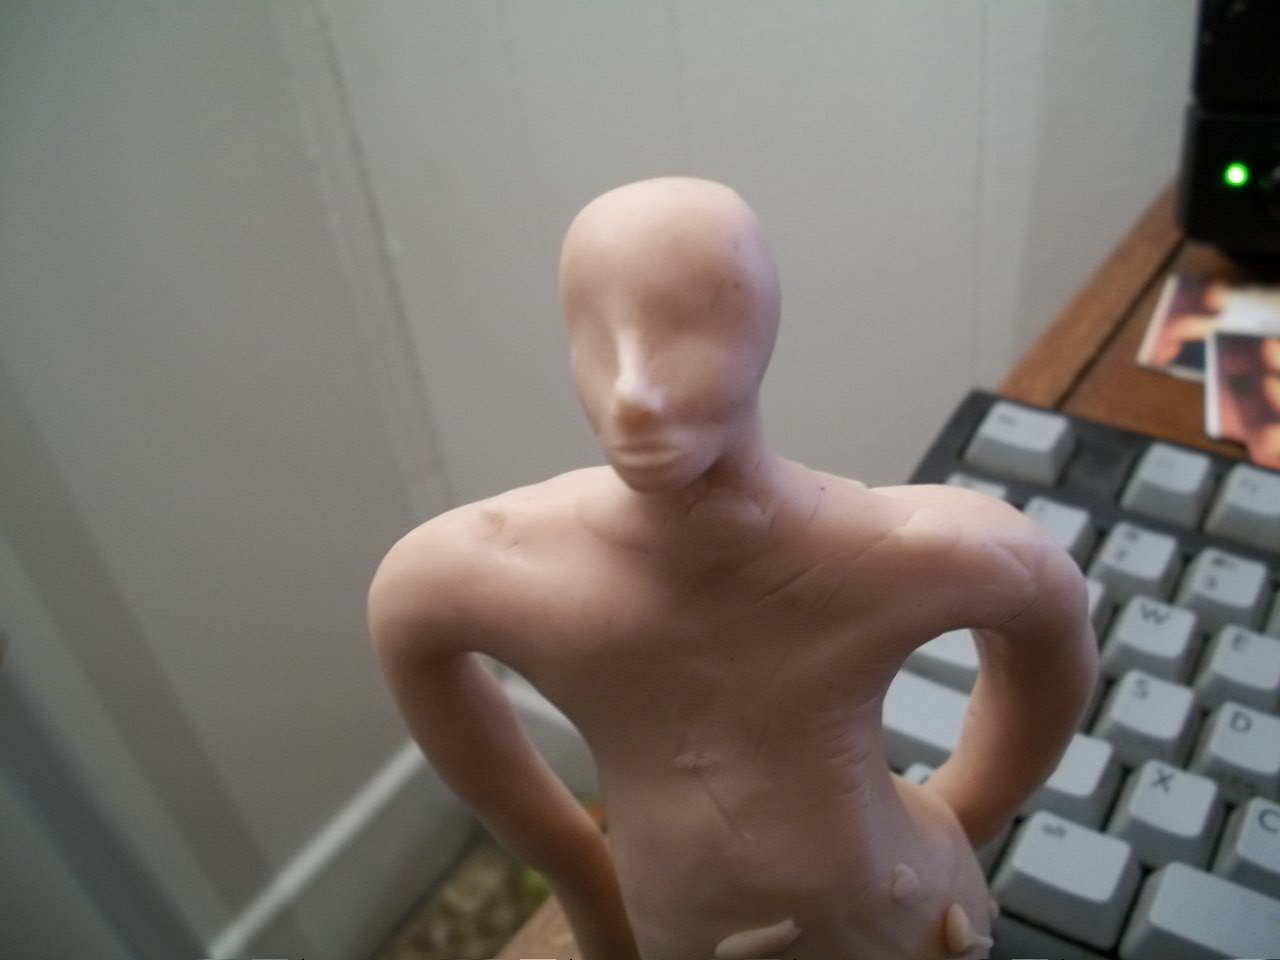
 So here it is, a how to, a tutorial... sort of.  The blog that will teach you... or rather show you how to sculpt a face in polymer clay step by step using the intuition method of just going for it.  All you need is some clay, a needle tool and some originality.  The blog is kind of long with quite a few pics... now when someone questions the validity of my sculptures, I will send them here.  I begin here with a ball of clay, for the body, and then put a oval-shaped piece of clay where I want the head to be.


The first step is to get some form to the formless face, in college they had us divide up the face into sections and draw all of these unnecessary lines... I say patut with it, just go with what you feel looks best, but still you need to get some contours on that flat face, plaster on a nice hunk of clay for the nose and then smooth it around the edges.  Then make a depression where the eye sockets would be (we are not sculpting eyes since I paint mine on).


Now we need a mouth, the mouth protrudes from our face so I put a little roll of clay where I want the mouth and smooth it in, so we have a "face" with a lump where the nose and mouth will be and depressions where you can draw the eyes in.


Here im just making a little definition for the jaw line

Here make a line with the needle or dental tool for the separation of the lips, to make the top lip, I simply push the clay up and into the shape of upper lips I want.


Okay, now please don't laugh, the sculptures all go through a sort of ugly ducking stage while things are getting worked out. Here the bottom lip is put on and smoothed on, then shaped, push it around until it is just right for you.


A bit of removal of jaw/chin to keep her feminine.
Now comes an important part of the entire piece, shaping the nose.  I decide on a upturned nose, and decide there is far too much to work with so just chop the end off.  I always add more clay in the beginning to the nose than I know I need since its easy to subtract later.


So I have been pushing the nose around, just pushing and pressing until it is pleasing to me. 
Now I notice the high cheekbones I want are nonexistent so I add some small balls of clay.  Smooth them out as per the nose and lips, it will be like little hills at first, but just press on them and they will go in. 


 You could stop at this point, but why?  Nostrils still need to be poked in and dragged to the sides to create nostrils; the face is asymmetrical and still needs shaping. After the basic elements are present, all you have to do is shape what you already have.

 Here I am subtracting clay from around the nose to make the nose stand out from the face and undo the smoothing we did in the beginning when putting the nose on, also giving it definition

This may seem totally unnecessary for some since I will just smooth it in later, but I add some clay here on the brow and chin (yes, the same chin that i subtracted), I am doing this because the heat of my hand warms up the clay and often makes it too soft, deforming it slightly just by being held... smooth it in!

Ok, now I need some forehead so I push the clay from behind up on top of the head and smooth out the brows a bit since they emasculate the figure.


Be sure you click the picture below to see the larger version.  It is really coming along at this point, but the only thing I have been doing to get it this way is press, press, pressing with my fingers and smush, smush, smushing with my hands to get the shape and size and symmetry I desire.

just keep pusing and subtracting clay from around the nose until its good for you.  You may obsess over a symmetrical face, or you can go for realism and say each and every person is different and unique, and for that reason leave it as is.


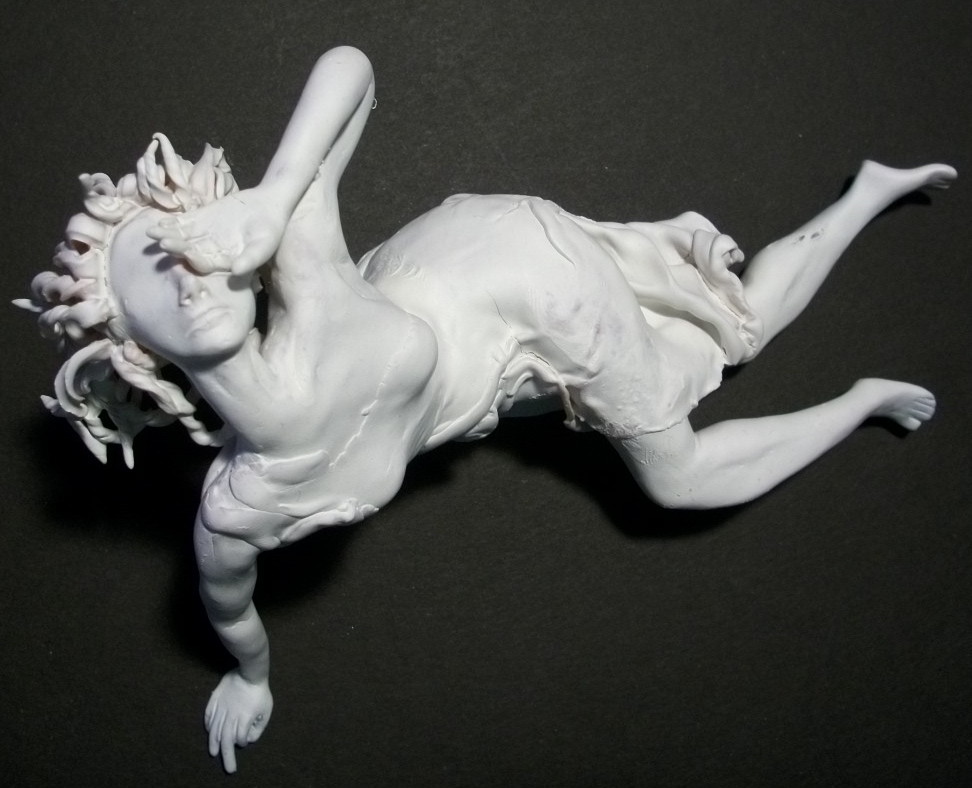
Now wasn't that easy?  This face became the white sculpture below:
It may not look much like the clay in the beginning of the blog, but rest assured, its all about pushing and pulling the clay into what you want it to look like... its easy and fun!