Alright, I guess this has been a long time coming, I have actually had requests on youtube to make videos on how to make cold porcelain and I do not get many requests in all honesty. People seem to want to make their own, and why not? You can save big bucks opposed to buying commercil stuff which always dries too dense/hard anyway.
So lets get right to it, you will need the following:
So lets get right to it, you will need the following:
1 cup of Corn Starch
1 cup of Glue (similar to Elmers)
1 table spoon of baby oil
1 table spoon of baby oil
1/4 teaspoon of liquid soap (clear hand soap)

Yay for pictures!
I took pictures all along the way and did not change the resolution, so feel free to enlarge the pics, especially the cooking ones, to compare to.
On the recipe, I do not know why it uses what in what ratio and why it doesnt have water or lemon juice, or whatever, everyone has a different recipe online, this is mine, its worked and proven itself to be a beautiful plastic clay body which also dries nicely and with that desirable slightly flexible end result. This is a recipe which you will love but I do encourage trying out of all different kinds of recipes, you have nothing to lose and lots of experience to gain!
So, lets begin. Place the cup of cornstarch in your pot.

Get the cup of Glue ready

I add the soap first, again why use liquid soap? I do not know, but it works, try it!

1/4 teaspoon only!

next add the cup of glue and the tablespoon of baby oil


get the stove fired up, I use gas, but I assume the setting would be low for electric.

place pan on fire! start mixing... if you have ever made fondant icing with the marshmallow and powderd sugar recipe, it will look like that does in its early stages at the very first stages when you start mixing.

very very low flame please, you will be spending several minutes here scraping and stirring

this is the consistency I mentioned above.

so after a minute or so and while its heating up, the consistency will go through several changes, this is normal so dont panic, if you used the ingredients in the measurements mentioned (double or triple or even half if you have to, but if the ratio is the same) then it should turn out just fine.
Below, you can see its looking more liquid than anything and you might begin to worry that this can never be molded, fear not!
Below, you can see its looking more liquid than anything and you might begin to worry that this can never be molded, fear not!

It may get very goopy and look more like elmers glue than anything, but keep stiring, I like to scrape the bottom of the pot/pan often so that I can get the parts that are becoming very thick up to the top and keep the entire mixture moving around.


Okay, after a few minutes, the mixture looks like this, like its curdling and you can feel its thickening up due to your spoon giving you lots of resistance.

okay here is the turning point, perhaps three to five minutes have passed, perhaps less, it depends on your heat, I like to work really slowly with the heat on low, soon after the mixture will begin to get REALLY thick where you feel it coming off of the pan as in the picture below.

TURN OFF THE HEAT!
This is an important step, a very important step as it will prevent you from ever overcooking your clay! Im sure many experienced folk can whip up batches easily as they know the heat and how it works, but for a first timer, turn off the flame at this point of thickening consistency, but keep the pot on the stove and keep stirring.
This is an important step, a very important step as it will prevent you from ever overcooking your clay! Im sure many experienced folk can whip up batches easily as they know the heat and how it works, but for a first timer, turn off the flame at this point of thickening consistency, but keep the pot on the stove and keep stirring.

Keep stirring and thickening up the material.

keep it up.

Okay, now we have a super thick mashed potatoes consistency, check out the photos if you are not sure, but the clumps will have given way to this more cohesive mass.


At this point the pan is just "very warm" so be careful, but if its not too hot, I take it off the stove at this point and keep stiring.
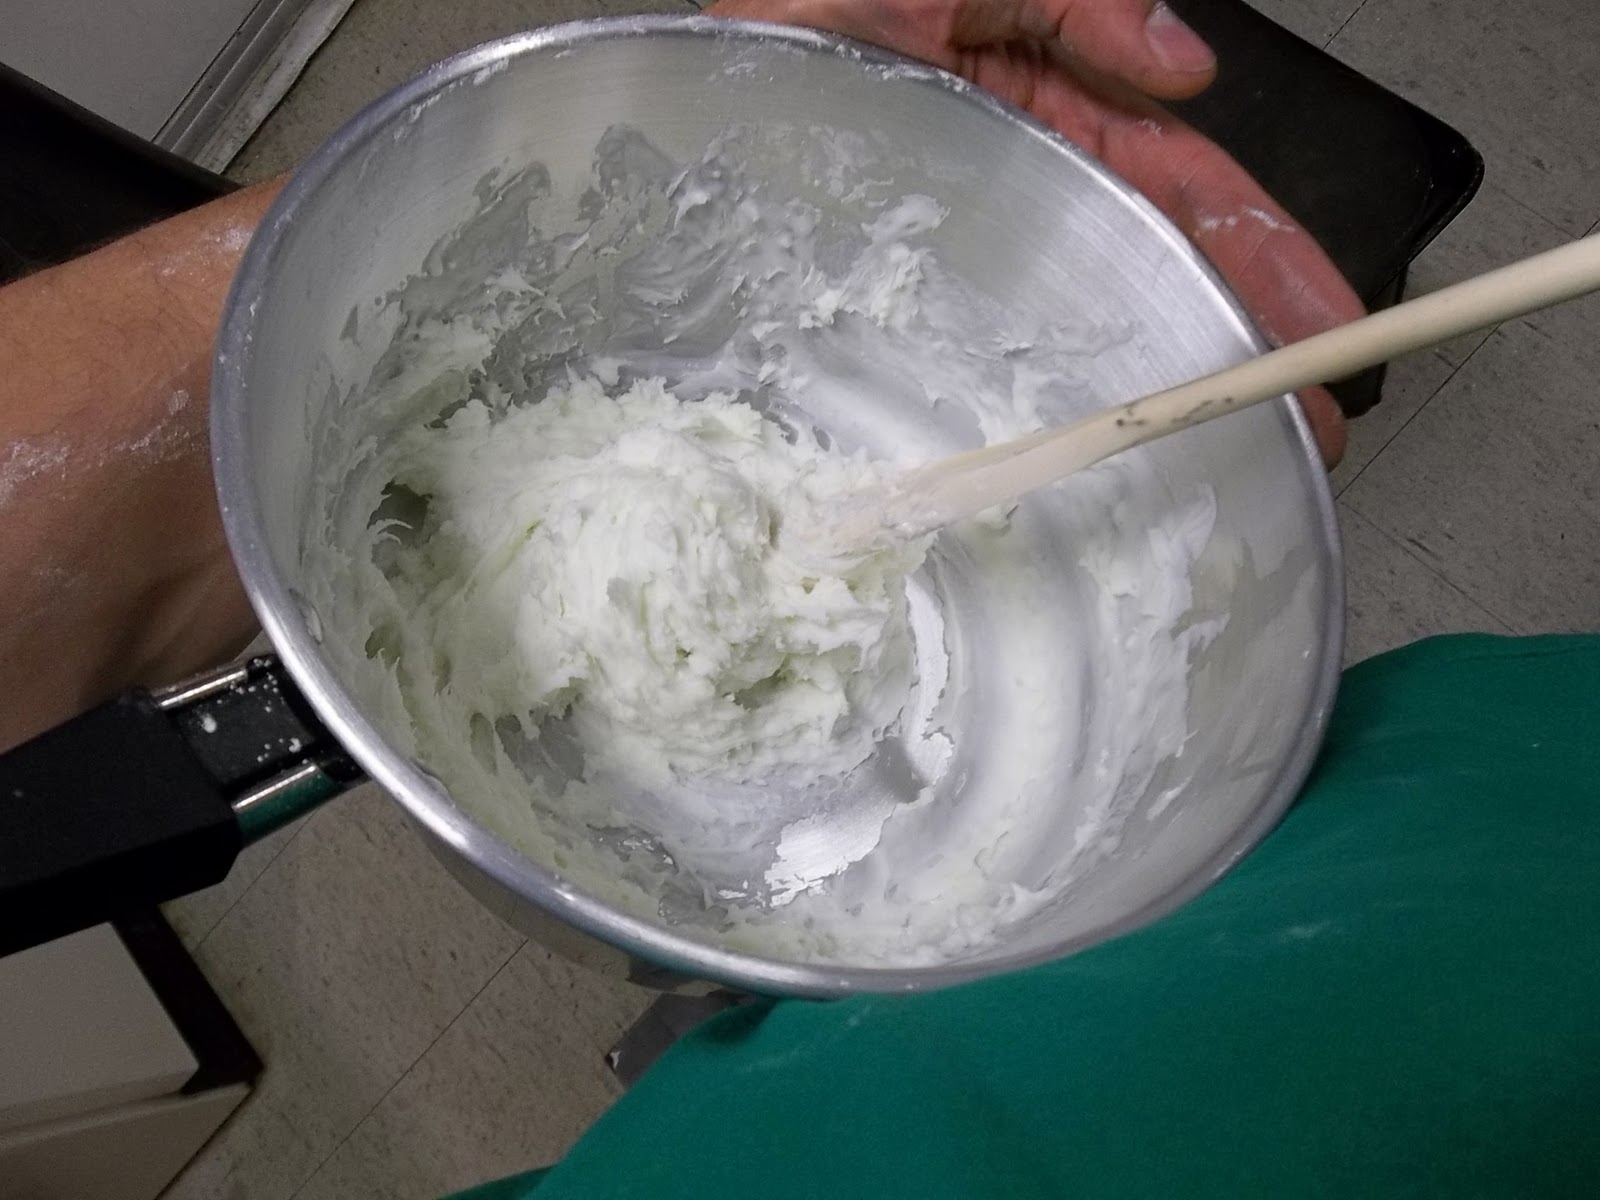
Ok, when the material is so thick that you feel its like dough, prepare your work area and dust lightly with some cornstarch... you are not wanting to really add any to the clay so just lightly dust the table and your hands.


SCRAPE out the clay (yes I know its cornstarch/glue, but we call it clay now) and start kneading!


I tend to wedge the clay and end up with a "rams head" like in ceramics, but you can just knead away until all air bubbles and lumps are gone, I do not find that this dries out very fast, and if you were dilligent with lots of stirring as I suggested, you will not need to knead long.

With experience you will know when its right, it should be a smooth and creamy consistency, see below as I pinch it to see how thin it can go... if you want to make miniature clay flowers then you will want to be sure you have conditioned this clay properly.


Its all set.

For the amount in this recipe, I like to seperate off into three balls, my work is small, and 2-3 female figures can be made from one ball this size, or dozens of miniature clay flowers!
I find that plastic sandwich bags are awfully conveinant for storing the balls of clay, I leave mine at room temperature, but you can store the in the refridgerator. Alternatively try saran wrap (or similar) and even clean re-used grocery store plastic bags.
I find that plastic sandwich bags are awfully conveinant for storing the balls of clay, I leave mine at room temperature, but you can store the in the refridgerator. Alternatively try saran wrap (or similar) and even clean re-used grocery store plastic bags.

Seal them up and they are ready for use!
Use the pasta machine and try making beautiful clay flowers or add small amounts of oil paints to create a vibrant rainbow of colors! Pendants, sculptures, dollhouse miniatures, you can do it all!
Cold porcelain takes more detail on than polymer clay or ceramics and it is most definitely ideal for things like little birds, flowers, cards/paper goods, and even dresses for sculpture-dolls.

I hope you enjoyed and more even I hope you try this, the cornstarch is less than $1 and the glue is also inexpensive (I got all my materials pictured here at a non-name brand dollar store). I would love to see what you all made with this tutuorial.
Oh... and have fun washing the dishes!
Oh... and have fun washing the dishes!

3 comments:
does this clay harden by itself or do you have to bake it
does this mixture harden by itself or do you have to bake it. If you have to bake it how long and at what temp. If it dries on its own how long does it take?
Hi, the cold porcelain will dry on its own, it also shrinks somewhat and if you color the clay with oil paints, the colors will darken upon drying. Have fun!
Post a Comment